I made a free meal-planning template in Notion
Introduction
It’s 2020 and I’ve accomplished something I never thought I’d do—I now cook 90% to 100% of my meals every day. After many failed meal prepping attempts, I finally zeroed in on the friction points I was experiencing and built a system that bypassed them instead of getting knotted up by them. What this looks like in practice is a set of relational no-code databases in Notion. After more than ten weeks, I can confidently say that this system has worked better for me than any other paid or free approaches I’d tried to solve the meal planning conundrum.
The main friction point I realized kept tripping me up throughout the years was related to the context within which I was planning my meals. Many of the meal planning templates and services I’ve tried online throughout the years organize meal planning within a temporal context. You plan your meals based on days, weeks, and months as your measurable units. My problem is that I don’t stick very well to those units of measurement—especially not while intermittent fasting—and this can lead to food waste. For example, some days I just don’t get around to cooking, or I end up eating leftovers, or I end up ordering takeout, or improvising with leftover ingredients.
Most recently, I tried PlateJoy as a paid meal planning service, but I kept running into this time conundrum. PlateJoy is a service that is very rigidly structured within a week-centric, time-based constraint, and this often led to recipe backups for me while I was using the service. Depending on your predispositions in the kitchen, this may not be a problem for you, but I’m cooking for one and a recipe backup can quickly become an issue.
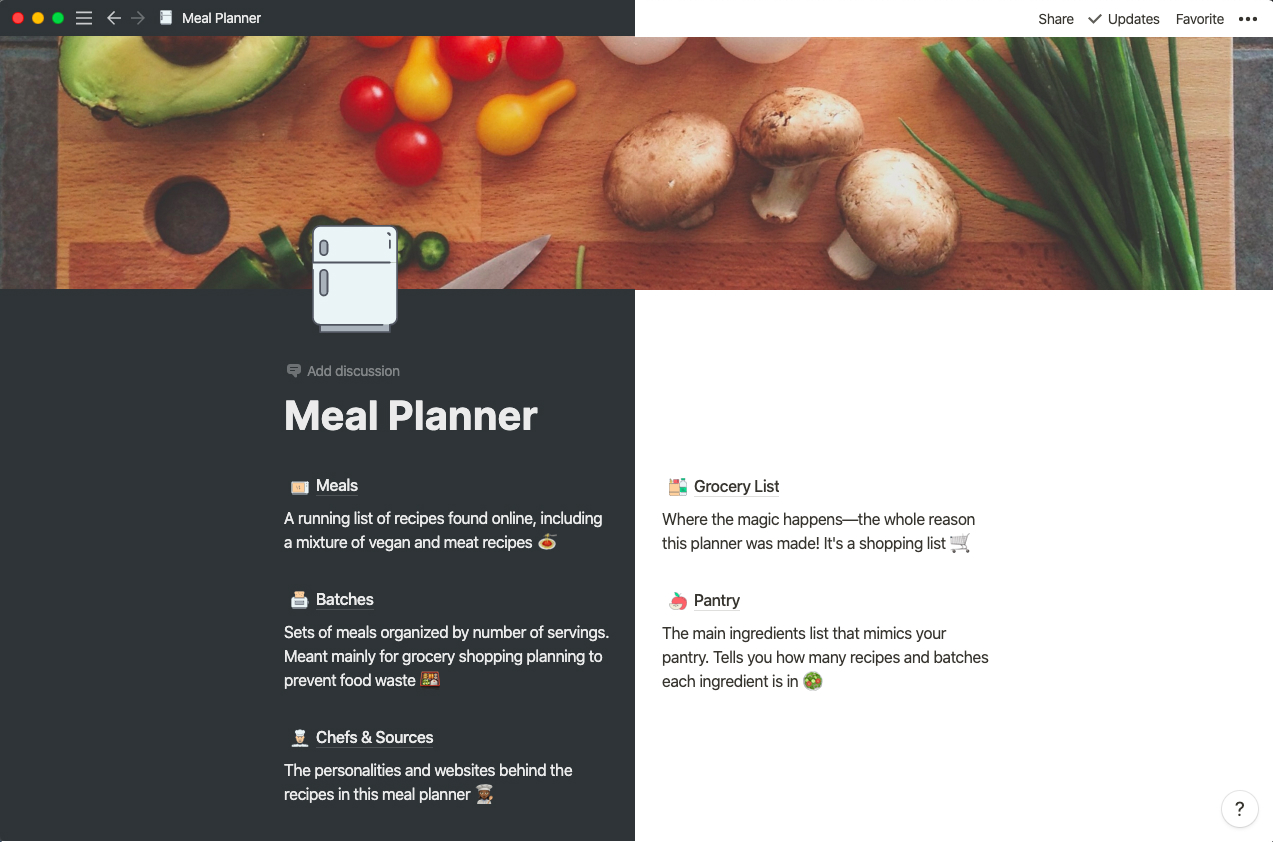
So how can you apply the solution I created to your own meal planning journey? Keep reading if you’d like to learn how to duplicate my meal planning template so you can try it for yourself using Notion. This post summarizes the tutorial you can also find in the footer of the template.
How to access this template
Template URL: https://www.notion.so/Meal-Planner-12d3d4145ba4428b8f85500579bba4e2
Tutorial URL: https://www.notion.so/How-to-Use-this-Template-f1a7d44b1023477982120a3d4b17c21e
Getting started
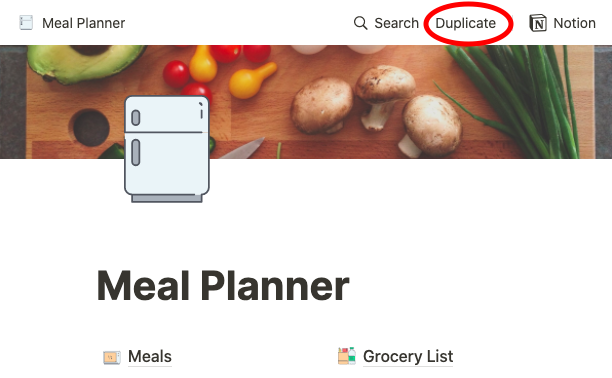
If you’re new to Notion, make sure you’ve created a new free or unpaid account first. This template is compatible with free workspaces and paid workspaces alike. Once you’re logged into your Notion account, navigate to the meal planning template and click the ‘Duplicate’ button on the top right of the page to copy the template into your own Notion workspace. Once it’s in your workspace you’ll be able to edit and modify it to your heart’s content.
Meal planning based on number of servings
This meal template uses a servings-based approach to meal planning, as opposed to a time-constrained approach. A servings-based approach to meal planning makes it easier to buy groceries, and helps minimize food waste.
When you use timeframes to organize our batches of meals, you may organize your meals around one or two week increments, for example. For some people this may work great, but for others a time-based approach may be too inflexible.
Using serving sizes to organize batches of meals lets you focus on the number of servings you’d like to cook within a given batch. This servings-based approach is especially useful if you have a non-traditional meal schedule, e.g. if you’re intermittent fasting or if you tend to be less strict about when you cook throughout the week.
Step 1: Decide on number of servings & create a new batch
First, decide on the number of servings you want to cook in your first batch of meals. Depending on your type of diet and the number of people you’re cooking for, your number of servings will usually translate to number of meals. In my case, I plan for two meals a day because I practice intermittent fasting.
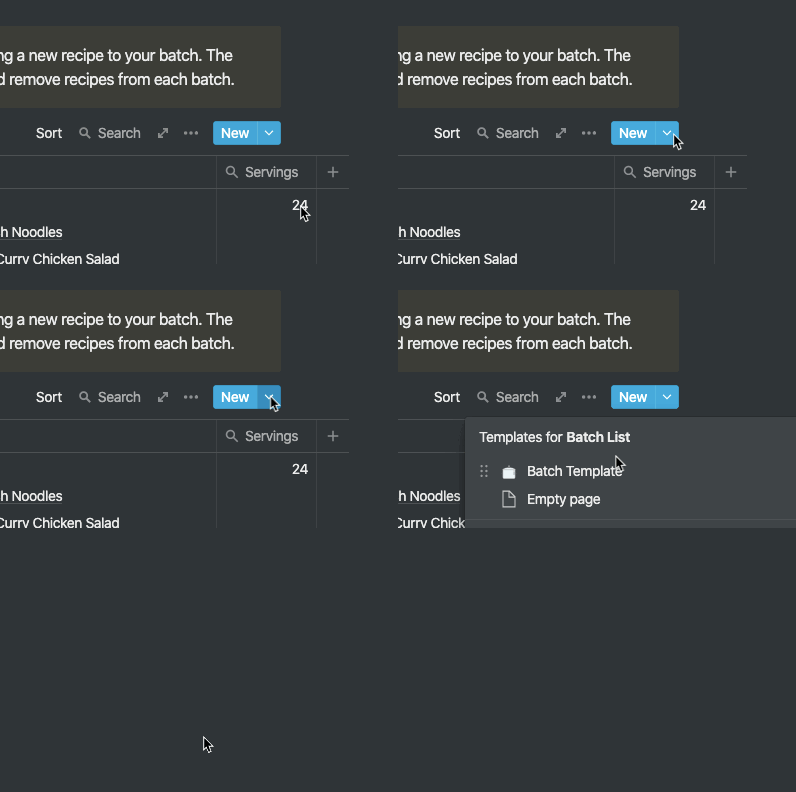
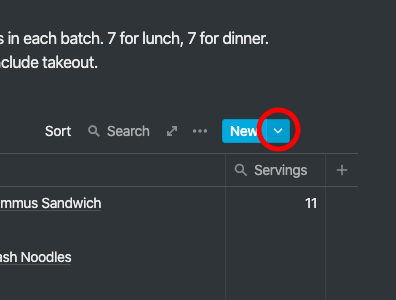
Once you know your number of servings, navigate to the ‘Batches’ page and click on the dropdown arrow next to the blue ‘New’ button. Click on ‘Batch Template’ option in the dropdown menu. This will create a new page for your first batch based on a template that contains everything you need to get started.
Step 2: Add meals to your new batch
This meal planning template comes with 45 recipes that range between vegan, vegetarian, and meat meals that have been bookmarked from various online chef bloggers. All information has been input manually, including recipe information, ingredient information, and chef/creator information. I’ve included a few breakfast recipes, and a handful of snack recipes, but the vast majority of these recipes are for lunch and dinner. Many of these are ideal for bulk meal prep as well.
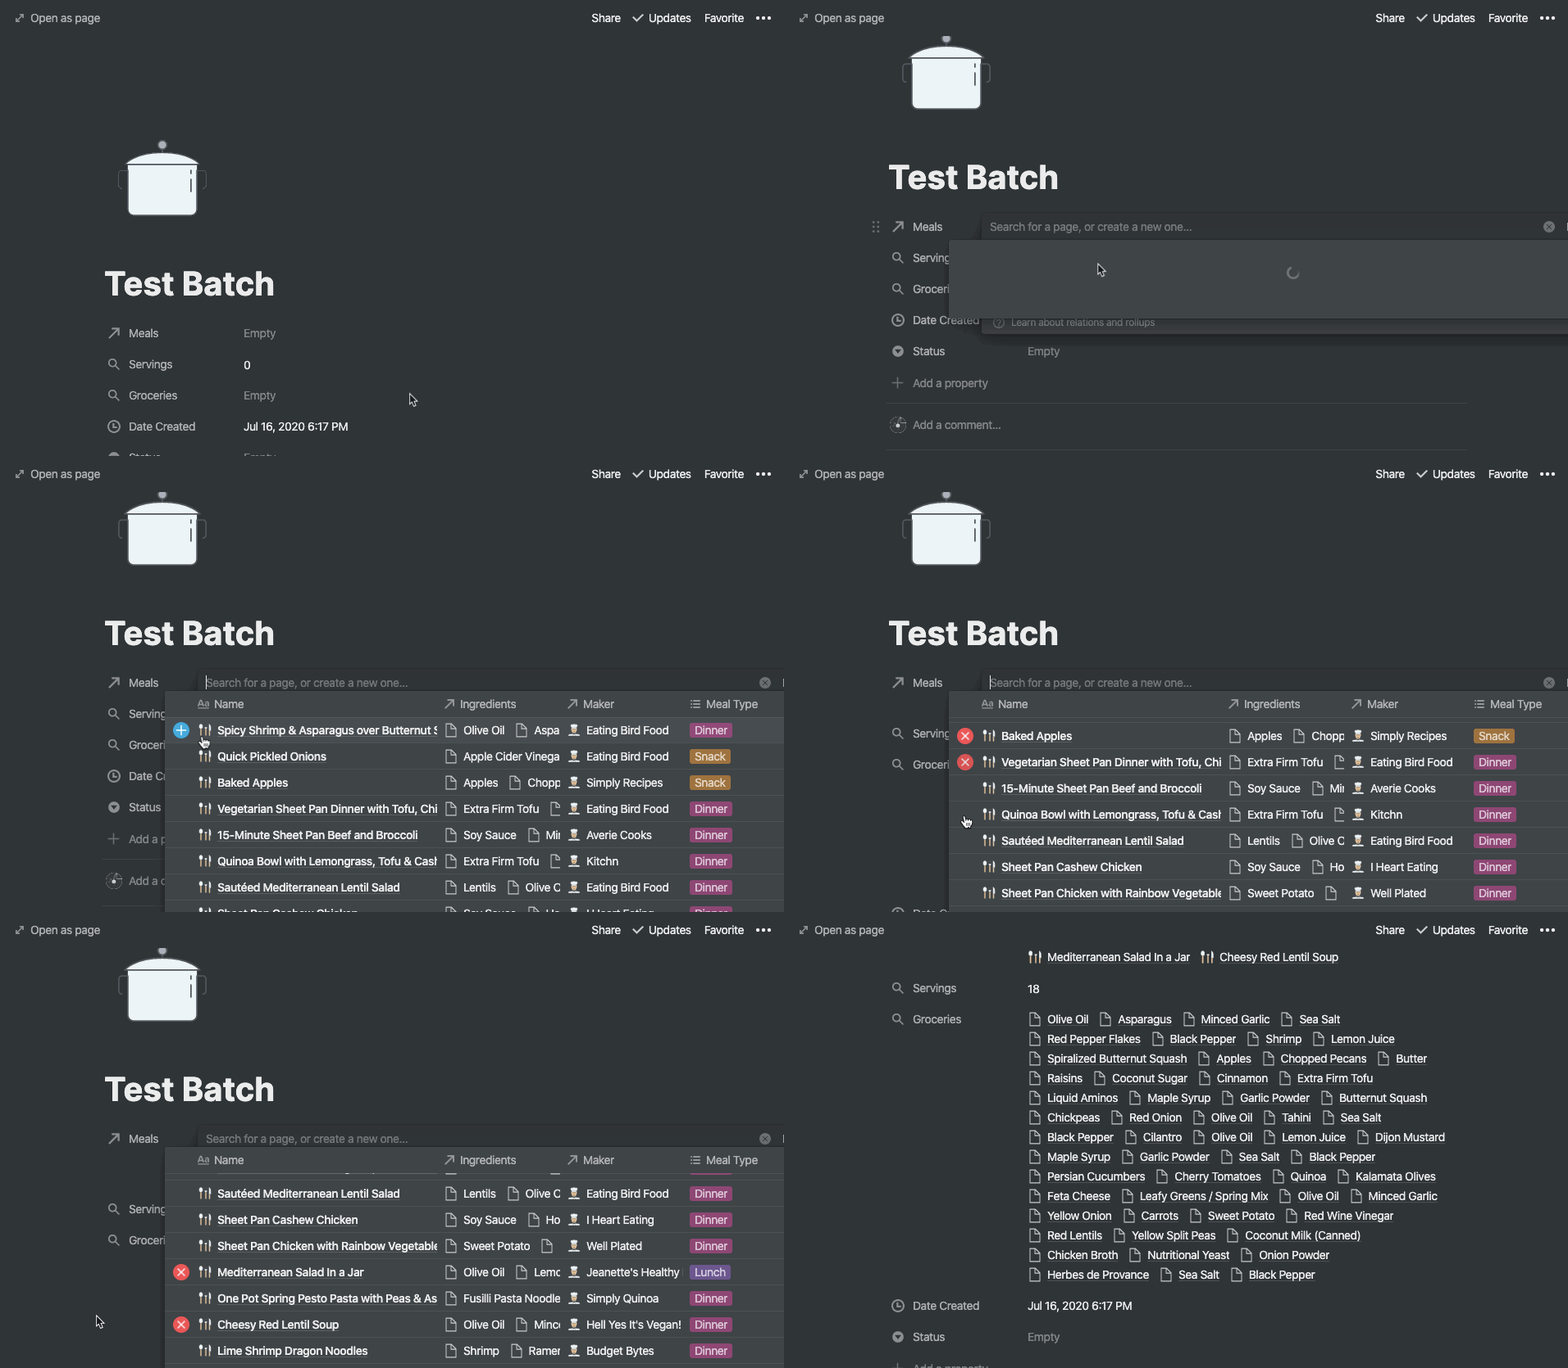
Click within the ‘Meals’ field to start browsing available recipes. Click on the plus sign that appears when you hover over a recipe to add it to your current batch. As you add recipes to your batch, the ingredients and number of servings will automatically be updated in the batch’s ‘Ingredients’ and ‘Servings’ fields.
Step 3: Mark the status of your batch as ‘Current’
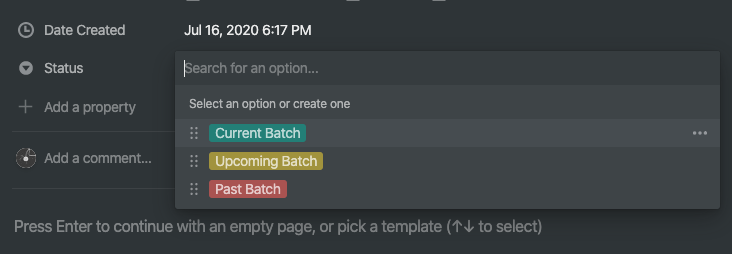
Remember to set the status of your new batch to ‘Current’. This status is what the Grocery List relies upon to tell you what your grocery list looks like for the batch in question. This template comes with three self-explanatory statuses, ‘Current’, ‘Past’, and ‘Upcoming’.
Step 4: View your grocery list!
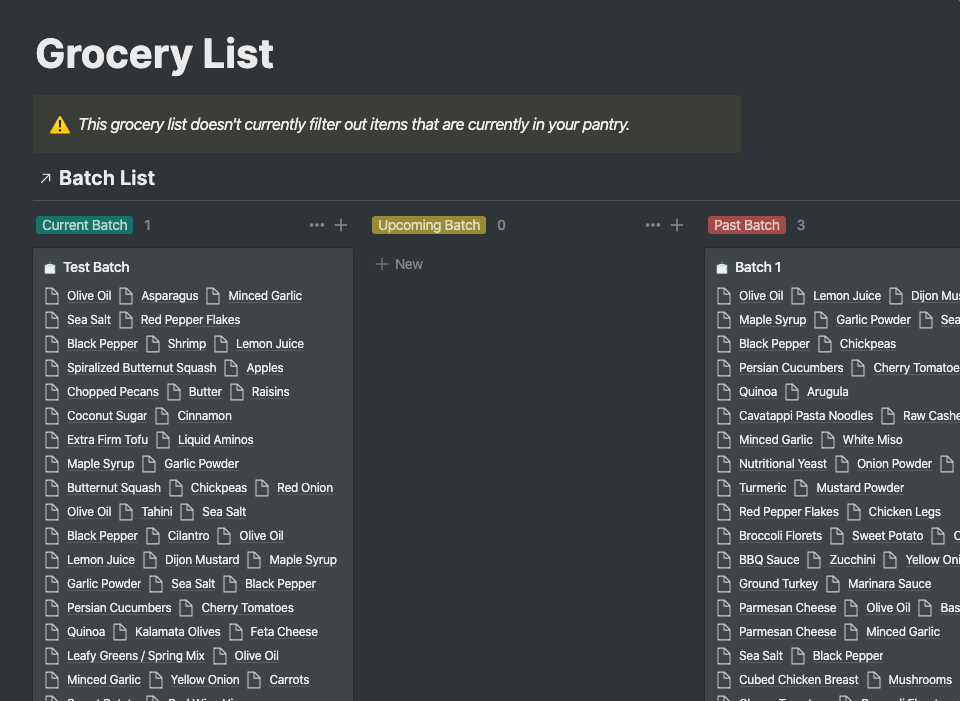
Navigate from the batches page to the grocery list page. If your batch statuses are up to date, then the list of the ingredients you’ll need for this batch should be listed under the ‘Current Batches’ column of the Grocery List kanban board, and all your past batches should be listed under the ‘Past Batches’ column. You can also plan for upcoming grocery lists with the ‘Upcoming Batch’ status.
I order my groceries online, so I usually just go down this list and add the items to my shopping cart. One of the downsides to this system is that there doesn’t seem to be an easy way to export this shopping list. This may be more of a problem for you if you physically go to the grocery store, because you won’t be able to check items off in this view in Notion. Still, it creates a pretty succinct list of exactly what you’ll need for your upcoming set of meals, which is something I’ve found extremely valuable.
Step 5: Add your own favorite recipes (optional)
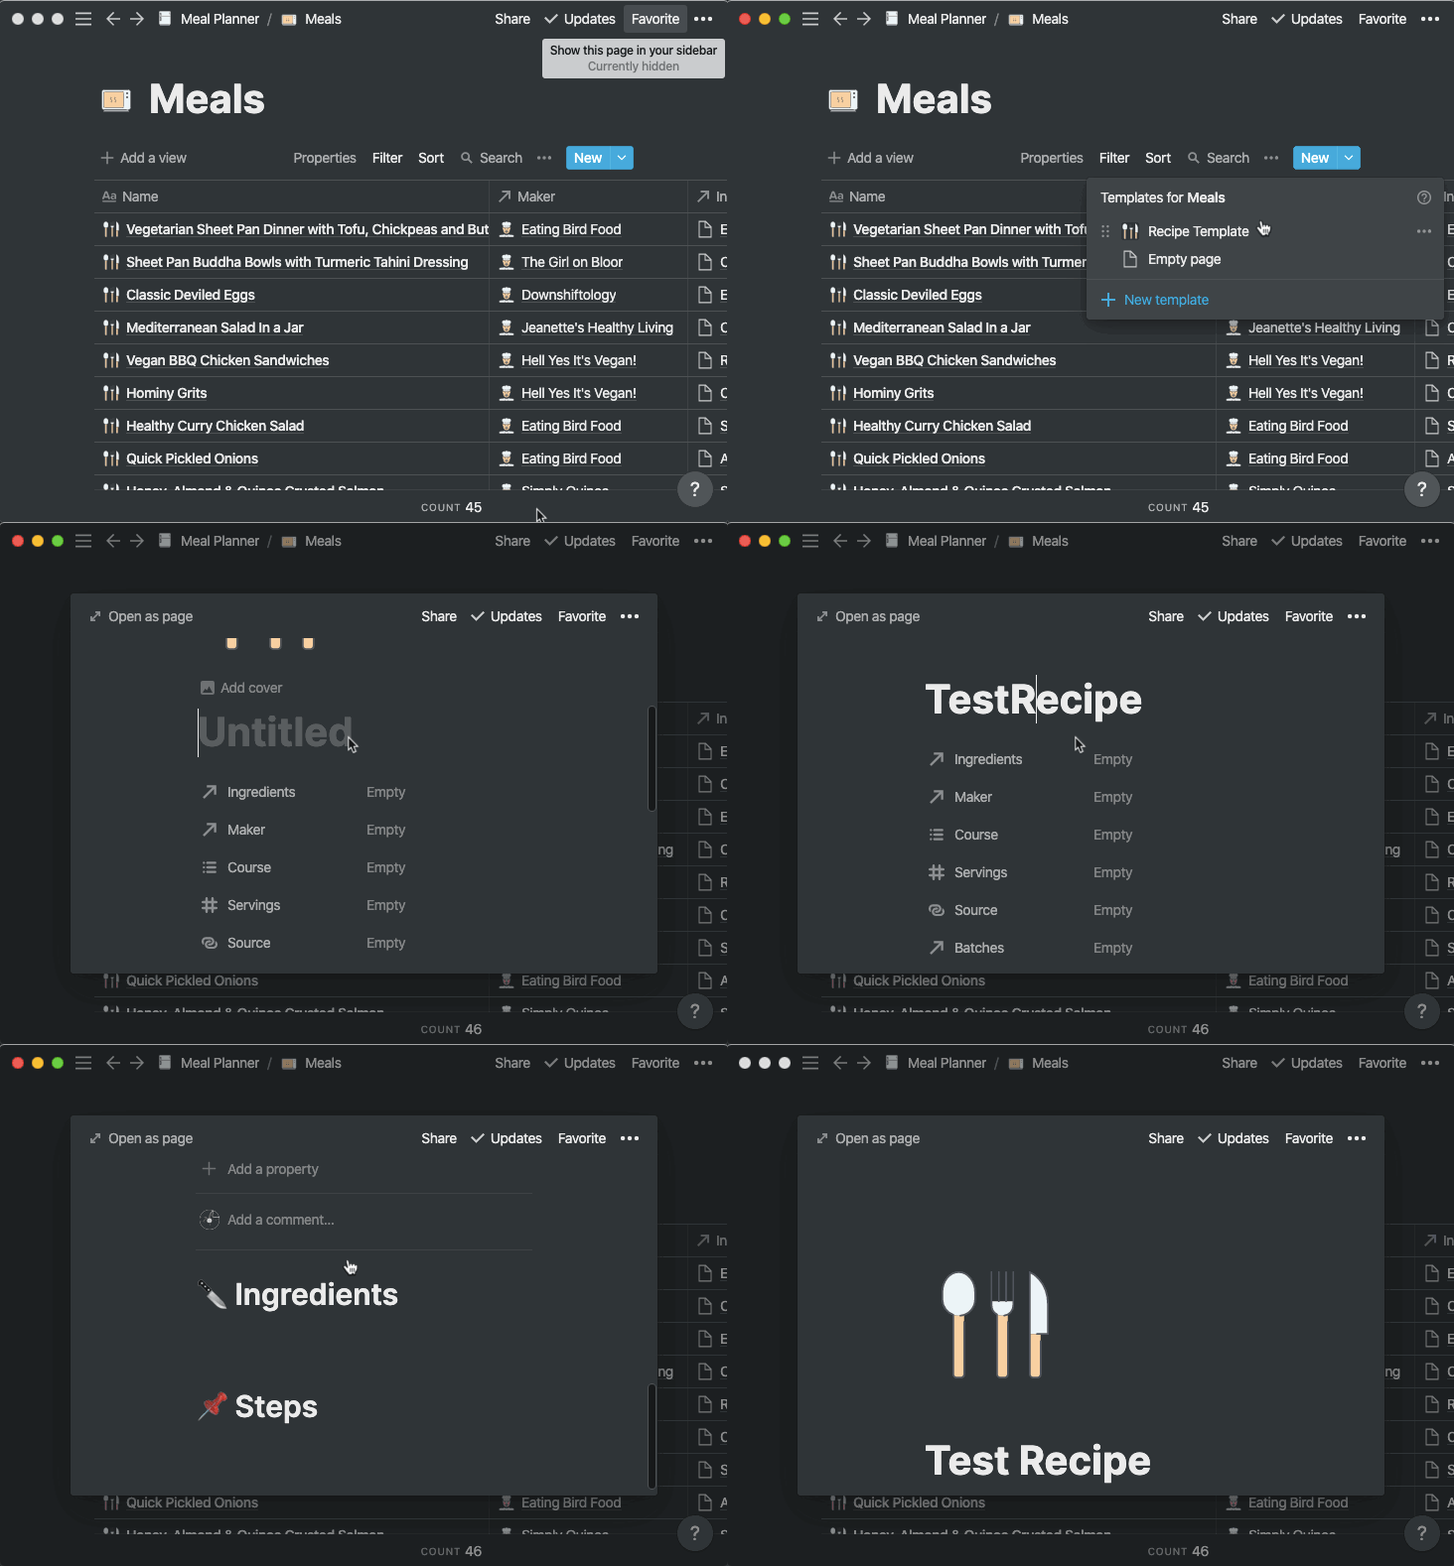
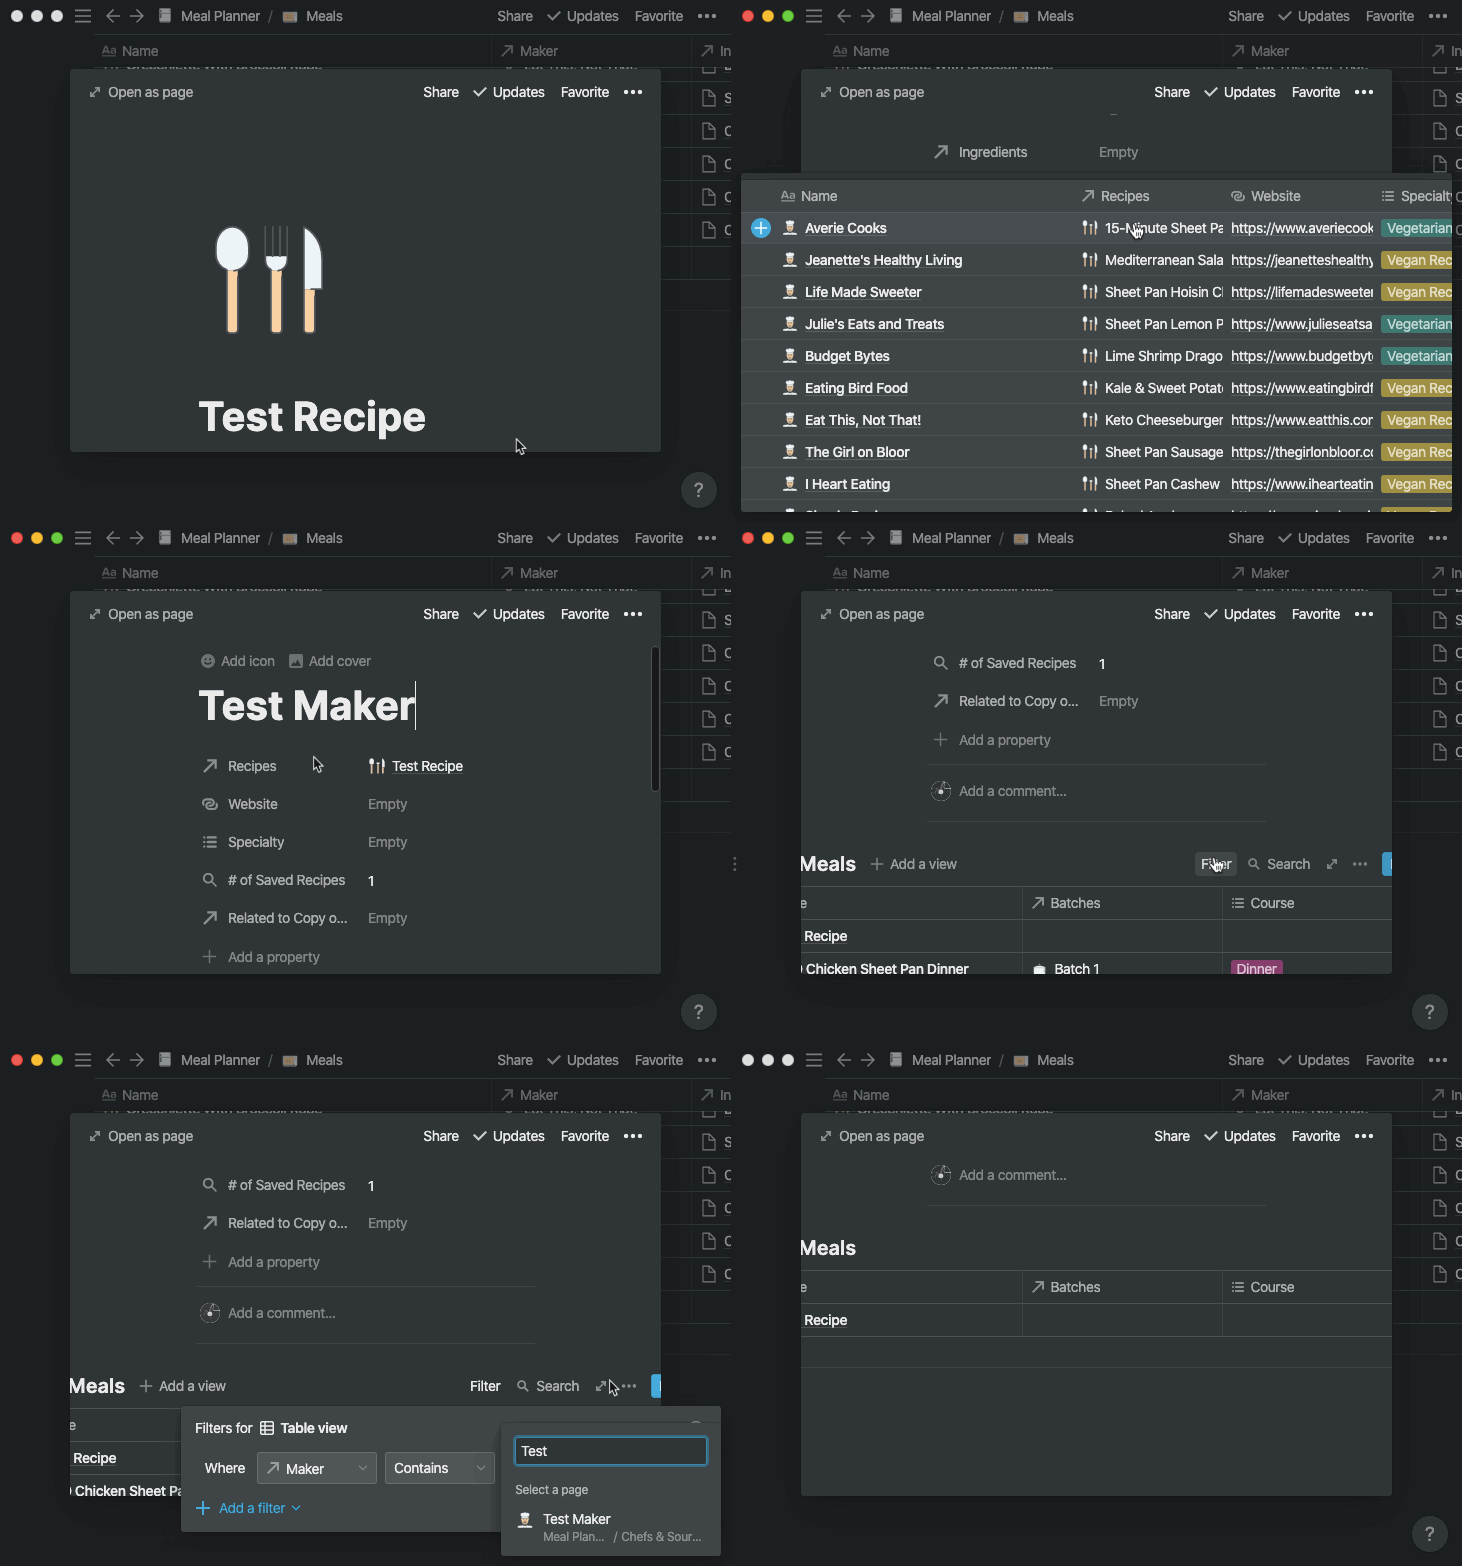
You may want to customize or add to the recipes included in this template. You can do this on the ‘Meals’ page, where you can indicate whether the recipe contains meat or dairy, its number of serving, source, maker, and more!
Step 6: Add your favorite chefs (optional)
When you add a new recipe to this template, if its creator isn’t currently in your database, you’re give the option to add them while you’re adding a new recipe. While this creates a placeholder for that chef, it doesn’t automatically create a templated page for them in your database. If you’d like to create a page for them, just navigate to the ‘Chefs’ page, and click on the chef in question. An empty page will appear, and if you scroll towards the bottom of this page and click ‘Chef Template’, this page will be populated with its page template.
Conclusion
This meal planning system won’t be for everyone, but it may appeal to some people who’ve tried a few other meal planning solutions with no luck. It’s not really that huge of a change from a time-based meal planning system, but for me the switch in thinking to servings-based has just clicked a lot more easily when it comes to plotting it all out—especially when it comes to ordering groceries.
If you happen to find this template useful, let me know on Twitter or send me an email. I’d love to hear how you used or modified this template to suit your needs!